
springboot加入swagger
步骤:1.导入依<!--swagger--><dependency><groupId>io.springfox</groupId><artifactId>springfox-swagger2</artifactId></dependency><!--swagger ui-->&.
·
步骤:
1.导入依赖
   <!--swagger-->
        <dependency>
            <groupId>io.springfox</groupId>
            <artifactId>springfox-swagger2</artifactId>
        </dependency>
        <!--swagger ui-->
        <dependency>
            <groupId>io.springfox</groupId>
            <artifactId>springfox-swagger-ui</artifactId>
        </dependency>
2.写配置
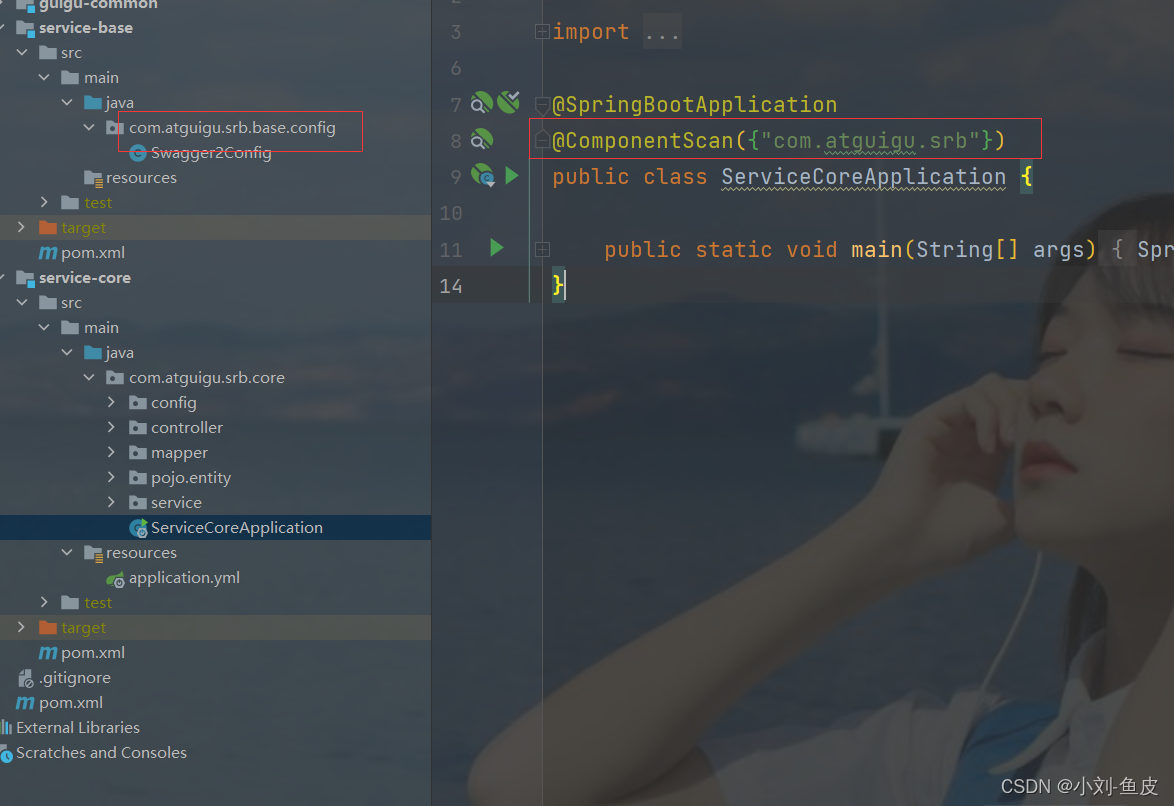
保证扫描包的时候可以扫描到
3.配置Swagger2Config类
@Configuration
@EnableSwagger2
public class Swagger2Config {
@Bean
public Docket adminApiConfig() {
return new Docket(DocumentationType.SWAGGER_2)
.groupName("adminApi")//api分组名字
.apiInfo(adminApiInfo())//文档中的注释
.select()//创建过滤器
.paths(Predicates.and(PathSelectors.regex("/admin/.*")))//过滤路径
.build();//构造器
}
private ApiInfo adminApiInfo() {
return new ApiInfoBuilder()
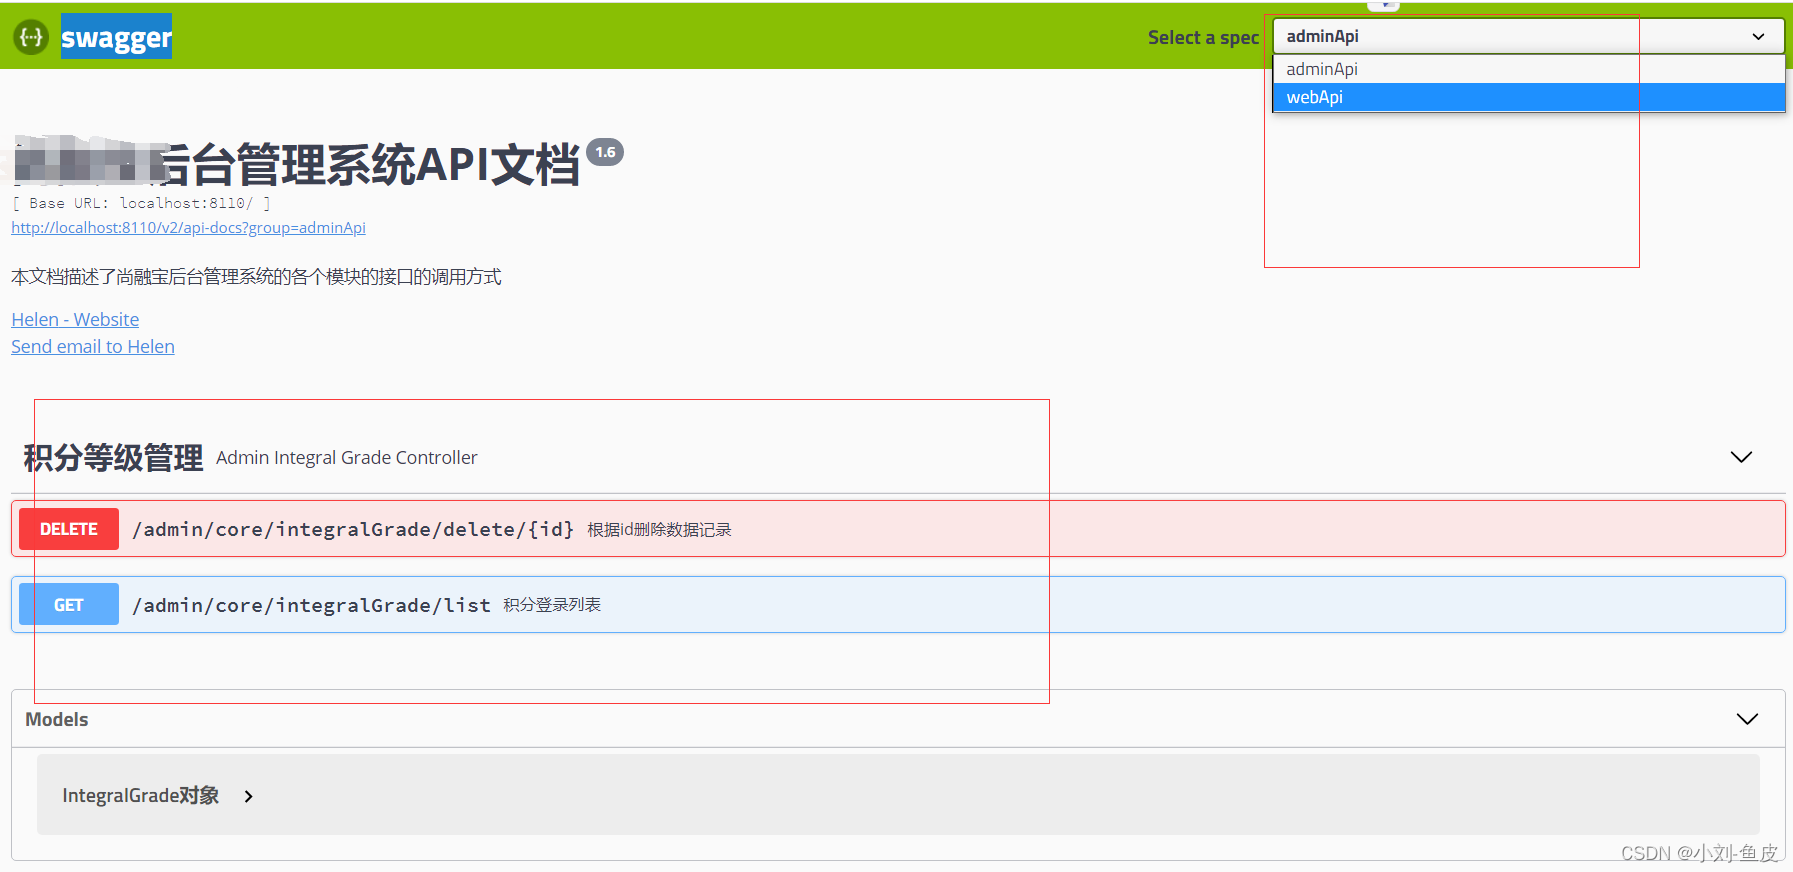
.title("后台管理系统API文档")
.description("本文档描述了后台管理系统的各个模块的接口的调用方式")
.version("1.6")
.contact(new Contact("Helen", "http://atguigu.com", "admin@atguigu.com"))
.build();
}
@Bean
public Docket webApiConfig() {
return new Docket(DocumentationType.SWAGGER_2)
.groupName("webApi")
.apiInfo(webApiInfo())
.select()
.paths(Predicates.and(PathSelectors.regex("/api/.*")))
.build();
}
private ApiInfo webApiInfo() {
return new ApiInfoBuilder()
.title("网站API文档")
.description("本文档描述了各个模块的接口的调用方式")
.version("1.6")
.contact(new Contact("Helen", "http://atguigu.com", "admin@atguigu.com"))
.build();
}
效果展示

权威|前沿|技术|干货|国内首个API全生命周期开发者社区
更多推荐


 0
0 0
0- 0


 已为社区贡献2条内容

所有评论(0)