
Swagger接口在线文档
swagger是什么?Swagger围绕OAS构建RESTFUL文档;Swagger动态生成接口定义文档;Swagger易用免费且开源;swagger就是将项目中所有的接口展现在页面上,并且可以通过页面进行简单的调用和测试。swagger工具介绍Swagger Editor:开源编辑器;Swagger UI:呈现可交互在线文档;Swagger Codegen:生成调用代码的工具;Swagger S
·
1.Swagger是什么?
Swagger围绕OAS构建RESTFUL文档;
Swagger动态生成接口定义文档;
Swagger易用免费且开源;
Swagger就是将项目中所有的接口展现在页面上,并且可以通过页面进行简单的调用和测试。
2.Swagger工具介绍
Swagger Editor:开源编辑器;
Swagger UI:呈现可交互在线文档;
Swagger Codegen:生成调用代码的工具;
Swagger Springfox:Swagger集成Spring生态;
3.Swagger有什么用
支持页面展示接口定义,节省专门编写接口文档;
基于代码生成文档,规避接口文档老旧问题;
支持接口调试,降低开发阶段调试成本;
4.Swagger支持主流的开发语言
5.Swagger注解
- 请求类注解
@API:
标识Swagger识别的类,放在@Controller注解并列的请求类,核心参数包含:value、tags、description
value:该参数没什么意义,在UI界面上不显示,不用配置。
tags:说明该类的作用,参数是个数组,可以填多个。
description:用户基本信息操作。 - 请求方法注解
@ApiOperation标识Swagger识别方法
@ApiImplicitParam标识方法的参数的说明
@ApiResponse标识方法返回值的说明 - 对象类注解
@ApiModel标识Swagger识别的JavaBean
@ApiModel放在JavaBean的类定义上
@ApiModelProperty标识JavaBean的属性
6.搭建Swagger
引入Swagger的依赖包
<!--		swagger-->
		<dependency>
			<groupId>io.springfox</groupId>
			<artifactId>springfox-swagger2</artifactId>
			<version>2.7.0</version>
		</dependency>
		<dependency>
			<groupId>io.springfox</groupId>
			<artifactId>springfox-swagger-ui</artifactId>
			<version>2.7.0</version>
		</dependency>
Swagger的属性配置
最重要的两个注解:@Configuration @EnableSwagger2
import com.google.common.base.Predicate;
import com.google.common.base.Predicates;
import org.springframework.context.annotation.Bean;
import org.springframework.context.annotation.Configuration;
import springfox.documentation.RequestHandler;
import springfox.documentation.builders.ApiInfoBuilder;
import springfox.documentation.builders.ParameterBuilder;
import springfox.documentation.builders.PathSelectors;
import springfox.documentation.builders.RequestHandlerSelectors;
import springfox.documentation.schema.ModelRef;
import springfox.documentation.service.ApiInfo;
import springfox.documentation.service.Contact;
import springfox.documentation.service.Parameter;
import springfox.documentation.spi.DocumentationType;
import springfox.documentation.spring.web.plugins.ApiSelectorBuilder;
import springfox.documentation.spring.web.plugins.Docket;
import springfox.documentation.swagger2.annotations.EnableSwagger2;

import java.util.ArrayList;
import java.util.List;

@Configuration
@EnableSwagger2
public class SwaggerConfig {

    @Bean
    public Docket createRestApi() {
        List<Parameter> pars = getParameters();
        Docket docket = new Docket(DocumentationType.SWAGGER_2).apiInfo(apiInfo());
        ApiSelectorBuilder selector = docket.select();
        // api接口包扫描路径
        List<Predicate<RequestHandler>> list = this.buildPackage();
        if (list == null || list.isEmpty()) {
            // 未配置,默认一个不存在的路径,避免扫描整个项目路径
            selector.apis(RequestHandlerSelectors.basePackage("com.xxx.xxxxxx_.controller"));
        } else if (list.size() == 1) {
            selector.apis(list.get(0));//
        } else if (list.size() > 1) {
            selector.apis(Predicates.or(list));
        }
        //
        selector.paths(PathSelectors.any())// 可以根据url路径设置哪些请求加入文档,忽略哪些请求
                .build().globalOperationParameters(pars);
        return docket;
    }

    public static List<Parameter> getParameters() {
        ParameterBuilder tokenPar = new ParameterBuilder();
        tokenPar.name("token").description("系统登录凭证").modelRef(new ModelRef("String")).parameterType("header").required(false);
        List<Parameter> pars = new ArrayList<>();
        pars.add(tokenPar.build());
        return pars;
    }

    private List<Predicate<RequestHandler>> buildPackage() {
        List<Predicate<RequestHandler>> result = new ArrayList<>();
        String value = System.getProperties().getProperty("swagger-api-package");
        if (value == null || value.trim().equals("")) {
            return result;
        }
        String[] packageArr = value.split(";");
        for (String str : packageArr) {
            if (str == null || str.trim().equals("")) {
                continue;
            }
            result.add(RequestHandlerSelectors.basePackage(str));
        }
        return result;
    }

    public ApiInfo apiInfo() {
        return new ApiInfoBuilder().title("练习UI接口文档") 设置文档的标题
                .description("了解更多请联系技术人员")// 设置文档的描述->1.Overview
                .version("1.0")// 设置文档的版本信息
                .contact(new Contact("史华昊", "https://blog.csdn.net/shihuahao0353?spm=1000.2115.3001.5343", "shihuahao1995@163.com"))
                .termsOfServiceUrl("https://blog.csdn.net/shihuahao0353?spm=1000.2115.3001.5343")// 设置文档的License信息
                .build();
    }
}
多应用的项目中,controller的路径可能不止一个,在启动类里面加上下面代码:
System.getProperties().setProperty("swagger-api-package", "com.xxx.xxxxxx.controller");
在Swagger配置类中使用System.getProperties().getProperty(“swagger-api-package”)来获取到项目的controller路径。
Swagger的注解配置
@Api(value = "用户管理", tags= "用户管理API", protocols = "http")
@RestController
@RequestMapping(value = "/user")
public class UserController {
    static Map<Long, User> users = Collections.synchronizedMap(new HashMap<>());

    @ApiOperation(value = "获取用户列表", notes = "查询用户列表")
    @RequestMapping(value = {""}, method = RequestMethod.GET)
    @ApiResponses({
            @ApiResponse(code = 100, message = "异常数据")
    })
    public List<User> getUserList() {
        return new ArrayList<>(users.values());
    }

    @ApiOperation(value = "创建用户", notes = "根据User对象创建用户")
    @ApiImplicitParams({
            @ApiImplicitParam(name = "id", value = "用户ID", required = true, dataType = "Long", paramType = "query"),
            @ApiImplicitParam(name = "name", value = "用户名", required = true, dataType = "String", paramType = "query"),
            @ApiImplicitParam(name = "age", value = "年龄", required = true, dataType = "String", paramType = "query"),
            @ApiImplicitParam(name = "ipAddr", value = "ip哟", required = false, dataType = "String", paramType = "query")
    })
    @RequestMapping(value = "", method = RequestMethod.POST)
    public BaseResult<User> postUser(@ApiIgnore User user) {
        users.put(user.getId(), user);
        return BaseResult.successWithData(user);
    }

    @ApiOperation(value = "获取用户详细信息", notes = "根据url的id来获取用户详细信息")
    @ApiImplicitParam(name = "id", value = "用户ID", required = true, dataType = "Long", paramType = "path")
    @RequestMapping(value = "/{id}", method = RequestMethod.GET)
    public User getUser(@PathVariable Long id) {
        return users.get(id);
    }

    @ApiOperation(value = "更新用户信息", notes = "根据用户ID更新信息")
    @ApiImplicitParams({
            @ApiImplicitParam(name = "id", value = "用户ID", required = true, dataType = "Long", paramType = "query"),
            @ApiImplicitParam(name = "name", value = "用户名", required = true, dataType = "String", paramType = "query"),
            @ApiImplicitParam(name = "age", value = "年龄", required = true, dataType = "String", paramType = "query")
    })
    @RequestMapping(value = "/{id}", method = RequestMethod.PUT)
    public BaseResult<User> putUser(@PathVariable Long id, @ApiIgnore User user) {
        User u = users.get(id);
        u.setName(user.getName());
        u.setAge(user.getAge());
        users.put(id, u);
        return BaseResult.successWithData(u);
    }
}
/**
 * 通用响应对象
 */
@ApiModel(description = "响应对象")
public class BaseResult<T> {
    private static final int SUCCESS_CODE = 0;
    private static final String SUCCESS_MESSAGE = "成功";

    @ApiModelProperty(value = "响应码", name = "code", required = true, example = "" + SUCCESS_CODE)
    private int code;

    @ApiModelProperty(value = "响应消息", name = "msg", required = true, example = SUCCESS_MESSAGE)
    private String msg;

    @ApiModelProperty(value = "响应数据", name = "data")
    private T data;

    private BaseResult(int code, String msg, T data) {
        this.code = code;
        this.msg = msg;
        this.data = data;
    }

    private BaseResult() {
        this(SUCCESS_CODE, SUCCESS_MESSAGE);
    }

    private BaseResult(int code, String msg) {
        this(code, msg, null);
    }

    private BaseResult(T data) {
        this(SUCCESS_CODE, SUCCESS_MESSAGE, data);
    }

    public static <T> BaseResult<T> success() {
        return new BaseResult<>();
    }

    public static <T> BaseResult<T> successWithData(T data) {
        return new BaseResult<>(data);
    }

    public static <T> BaseResult<T> failWithCodeAndMsg(int code, String msg) {
        return new BaseResult<>(code, msg, null);
    }

    public static <T> BaseResult<T> buildWithParam(ResponseParam param) {
        return new BaseResult<>(param.getCode(), param.getMsg(), null);
    }
    //getset方法
    public static class ResponseParam {
        private int code;
        private String msg;

        private ResponseParam(int code, String msg) {
            this.code = code;
            this.msg = msg;
        }

        public static ResponseParam buildParam(int code, String msg) {
            return new ResponseParam(code, msg);
        }
        //getset方法
    }
}
访问http://localhost:8080/swagger-ui.html就可以看到接口文档了~
7.Swagger的注意事项
1.controller的方法必须明确指定请求类型,缺少请求类型情况下列出所有请求类型。
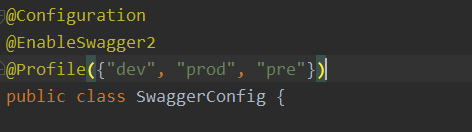
2.Swagger在生产环境不能对外暴露,通过@Profile({“dev”, “prod”, “pre”})指定环境。
通过启动参数来规定这次启动是什么环境。

3.默认的访问地址需要携带默认访问路径,通过server.servlet.context-path指定默认访问路径。

访问http://localhost:8080/swagger/swagger-ui.html就可以了

权威|前沿|技术|干货|国内首个API全生命周期开发者社区
更多推荐


 1
1 0
0- 0


 已为社区贡献1条内容

所有评论(0)